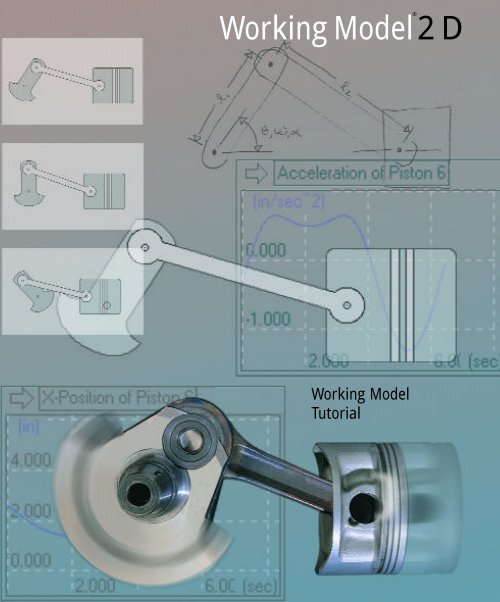
Working Model Tutorial by Mark Minor This tutorial provides basic information for modeling planar rigid body dynamics using the Working Model 2D software that was included with your text. To change the unit system.

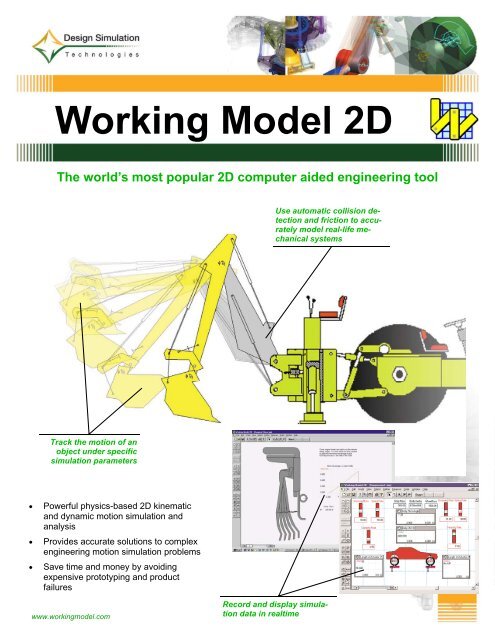
Working Model 2d
This exercise uses the English unit system of pounds and feet.
. An object with an initial velocity of 25 ms upward lands 80m below its starting point. To change the unit system. Ensure that Working Model is installed on your computer.
Tutorial 2 Example 11-10. Import your 2D CAD drawings in DXF format. Norton Design of Machinery.
Figure 1-1 Numbers and Units dialog 2. Draw the cross-link close to the top end of the slender rod as shown in Figure 2. Analyze your latest design by measuring force torque acceleration etc.
This exercise uses the English unit system of pounds and feet. 1 Start Working Model 2D. Choose Numbers and Units.
If you do not have Working Model click here. From the View menu. This video shows you how to connect imported DXF bodies ieAutoCAD files in Working Model 2D.
This opens a simulation. Working Model Tutorial by Mark Minor This tutorial provides basic information for modeling planar rigid body dynamics using the Working Model 2D software that was included with your text. Working Model by entering desired properties directly on the screen.
To begin install Working Model and go through each step of the demonstration described below. Simple four bar linkage to illustrate how to generate a model in Working Model 2D. Choose English pounds from the Unit System pop-up menu.
Tutorial 1 Problem 10-29. Draw the vertical slender rod and set the height to 6 ft change the width to about 04 ft in order to show a slender rod but actual width is not important in this example. Select View then Numbers and Units then More Choices Select Distance in Millimeters Select Rotation.
The first simulation is Newtons first experiment dropping a block. B Creating a simple projectile motion simulation. A wheel with Diameter of 12m mounted in a vertical plane accelerates uniformly from rest at 3 rads2 for five seconds and then maintains uniform velocity in counterclockwise direction.
Please use this playlist to help you teach learn or design with Working Model 2D. 1 Starting Working Model 1. Steps in Setting-Up the Drawing Area 1.
Choose English pounds from the Unit System pop-up menu. The Numbers and Units dialog appears. 2 Set display and units.
Insert the Working Model CD into the CD-Rom drive and follow the installation instructions 2. D Measure and display the output from the simulation. Figure 1 Initial Setup.
Norton Design of Machinery. Determine the angular velocity of AB and the velocity of the piston at A. Choose Numbers and Units.
Otherwise click here to download a PDF of the tutorial. For a step-by-step introductory tutorial turn to the next page. To collect data click 2D.
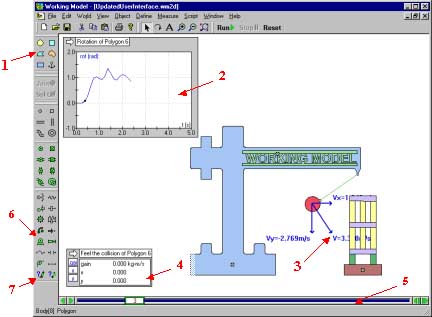
From the Windows Menu click on Programs then Working Model 2D and then Working Model 2D. Working Model 2D uses SI units meters-kilograms-seconds by default. Understanding the Working Model workspace.
Working Model 2D uses SI units meters-kilograms-seconds by default. When prompted for a serial number enter DEMO or enter your licensed serial number 3. Otherwise click here to download a PDF of the tutorial.
Determine normal and tangential acceleration of a point at the top of the wheel for t0 and t6. Run stop reset single step or pause the simulation at any time. Figure 1-1 Numbers and Units dialog 2.
1 Creating a Falling Block. To draw a rectangle click on the Rectangle tool then click in the workspace and draw a long thin rectangular block. What you will do during Tutorial 1.
An introduction to the Synthesis and Analysis of Mechanisms and Machines. Type in the precise values and the modification will take effect immediately. When the Choose Folder window appears click OK.
Put your 2D CAD files to motion with Working Model 2D. B Learn how to set up the environment of Working Model. Simply select the desired object and Working Model will present you with a list of parameters such as width height and position of a body that can be edited on-the-fly.
C Run the simulation. Tutorial 4 Example 12-6 Bar BC in Figure 1 has an angular velocity of 373 rads clockwise. 1 Creating a Falling Block 1.
A Tour of the workspace of Working Model. Find its maximum height total time in the air and the velocity at the time of its landing. This opens a simulation.
Acting on any object. Select View then Workspace Check the XY Axes and Coordinates boxes and then select Close X and Y indicator boxes showing cursor location will appear in the lower left corner. An introduction to the Synthesis and Analysis of Mechanisms and Machines.
View output as vectors or in numbers and graphs in English or metric units. The Numbers and Units dialog appears. Working Model Tutorial for Four Bar D Mechanism.
Choose Accuracy from the World Menu and change the settings of the Animation. Installing Working Model 1. If you do not have Working Model click here.
From the View menu. Set the Unites to SIradians on Numbers and Unites sub menu and click on.
Working Model 2d Tutorial Claymore
2
2
Working Model 2d 2d Kinematics Dynamics Software Engineering Simulait
Working Model 2d Wm2004 New Features

Clock Simulation Working Model 2d Youtube
Working Model 2d Professional Design Simulation Technologies

Building Mechanisms With Working Model 2d 222016 1252 1 Youtube
0 comments
Post a Comment